
Trolling is often underestimated as a fishing method requiring little skill. This couldn’t be further from the truth. Successfully trolling requires thought about a strategic spread, matching lure selection to boat speed, and understanding how to maintain your lures and bait at a targeted depth.
Inshore Trolling Spread
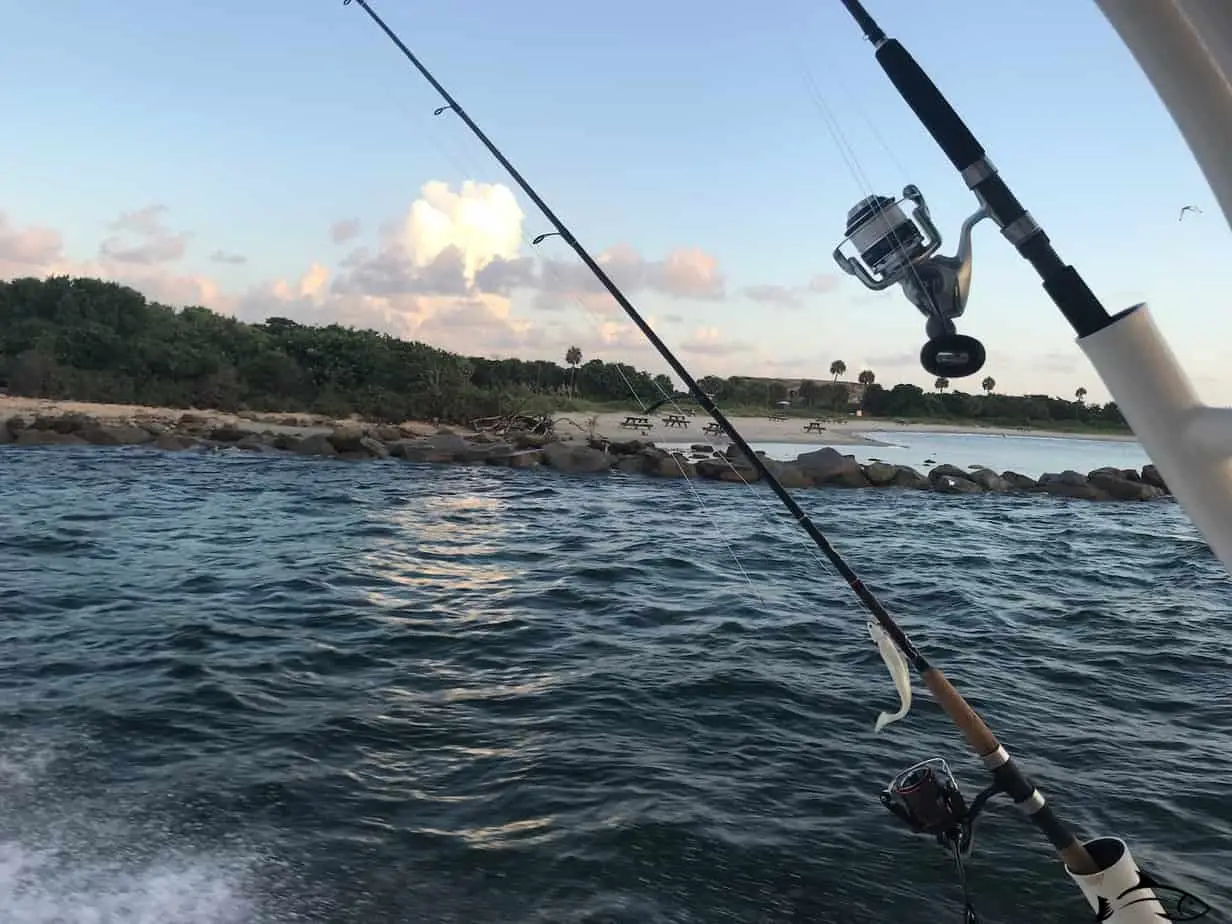
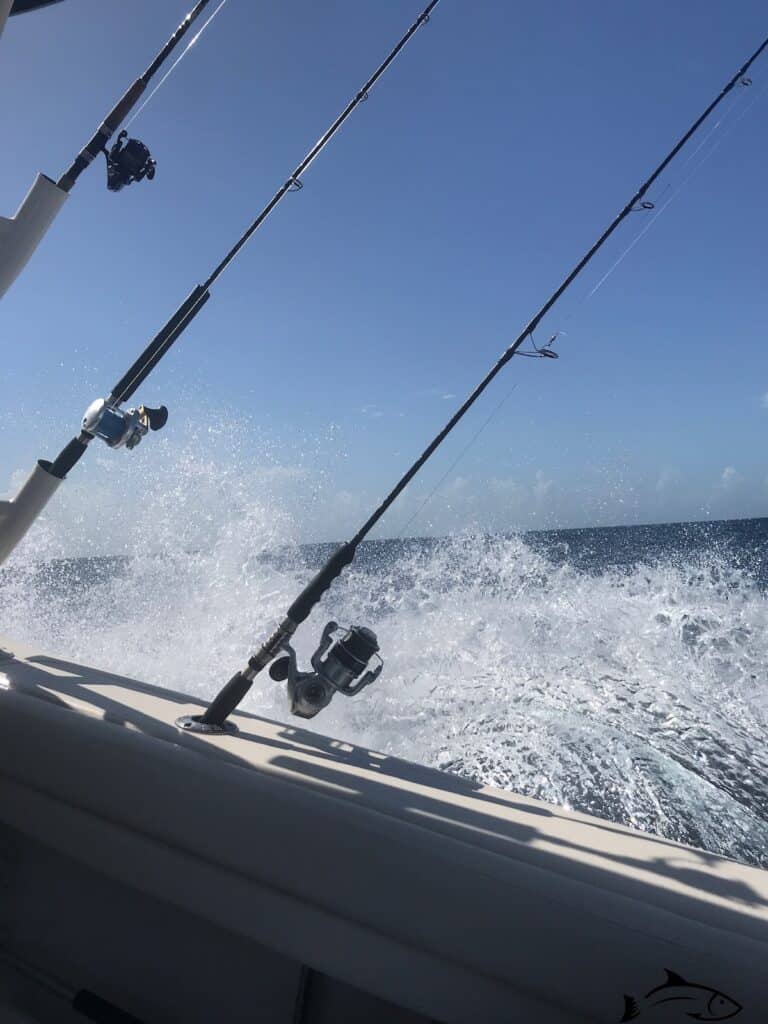
A strategic spread of lines will improve the efficiency of your trolling efforts. It’ll help you cover the area width-wise, and at a variety of depths, and when done correctly, you’ll prevent your lines from tangling with each other. Getting the width can be a challenge on bay boats or kayaks inshore because may be limited rod holders. Luckily, there are some clever products on the market to help increase your rod spread when trolling in a boat that doesn’t have the big T-top outriggers like an offshore fishing boat. For example, this Dual Offset Rod Spreader will give you 2 rods in one rod holder, or you can go with something like this Clamp On Rod Holder that you can hook to the rail above your center console windshield.
Inshore trolling can be done effectively in no wake zones as you’re leaving the boat dock, as you’re going under a bridge, near drop offs, and inshore reefs. In this scenario, you may want to keep the tackle and spread pretty simple. I’d recommend starting by using 4 rods. Two positioned toward the outside of the boat, and two more inward. The two on the outside should vary in length, such as 120 ft and 90 ft of line out. The two more inward should also vary and be at about 60 ft out and 30 ft out.
In addition to varying the amount of line out, you’ll also want to vary the depth with each line. This allows you to cover the most water to improve your odds of finding the fish. Getting depth can be done in a variety of ways. You can use a stout rod with a planar, a trolling lead with a spoon on spinning tackle, or simply a deep diving lure on spinning tackle. Usually for trolling inshore, I tend to keep it simple and use crankbaits with a variety of lip sizes to accomplish varying depths.
Working Your Lures
The spread is only one aspect of the trolling game. To succeed, you’ll need to understand that during trolling, the action of the lure is controlled by the speed and maneuvering of the boat. You’ll need to make sure that you’re traveling at the correct speed for your lures, and you’ll also need to drive the boat in S curve patterns. The S curve will cause the outside lure to speed up and rise, and the inside lure to slow down and sink. The lures will look more natural in their presentation this way. They’ll look like fleeing baitfish and often times you’ll notice that bites happen when the boat changes direction.
Trolling can be somewhat frustrating. Sometimes you’ll strike out completely and sometimes you’ll notice the fish are biting only one line. In the case of only one line getting any bites, its probably because the lure on that line is operating in its sweet spot of speed. You can try pulling each of the remaining lines closer to the boat to inspect the lure. Do this by pointing the rod tip down toward the water, with the lure close enough to see, and you should be able to tell if the lure is wobbling, or darting appropriately or not. If its spinning like crazy, you are probably going too fast for that lure. You can try going slower, or swap your lure and do the same check until you find a lure that’s working properly at your speed. Sometimes the issue is the lure isn’t tracking true. In this case, you may need to tune it by bending a component until the issue is fixed.
Speed is one aspect of maneuvering the boat, and another is the sharpness of your turns. You may notice that if you turn too sharply when doing your S curves, your lines cross each other. The various line lengths and lure depths is meant to cover the most water, but also has the added advantage of minimizing the chances of tangled lines. Trolling with several lines out can get pretty tricky. Be aware that treble hooks can also cause an increase in tangled lines. We recommend swapping the hooks out on your lures for corrosion resistant inline J hooks, like this one. This will also help when it comes to removing the hook from the lip of a fish. If you’ve ever had trouble removing a treble hook from a fish, you’ll appreciate this idea.
One of the advantages of working with a simple setup with no trolling sinkers, or planers is that once you’ve got a fish on, you can reel the fish all the way in without needing to handline in the leader. When using a planer, you can reel in the line up until you reach the planer, and then you’ll have 5-20 feet of leader to handline in with a fish fighting you. With crankbaits and spoons, there’s nothing in the way and you can reel in the whole way, opting to use a net at the end if you need it. Sinkers are much smaller than a planer, but you’ll have the same issue where you can reel in the line up until the point of the sinker, and then you’l have to handline it in. On the plus side, sinkers are much more modest in the water, so a shorter leader is generally used. Often times a planer is used in conjunction with a 20 ft leader to make sure the planer isn’t going to spook the fish. To learn more about choosing a leader, read our article Types of Leader Lines & their Uses.
Fish tend to strike trolling lures pretty hard so you’ll be able to tell immediately when you’ve got a fish on. When you’ve got a fish on, it can get pretty tricky to reel the fish in, steer and drive the boat, and keep your rod out of the way of your other lines. Sometimes you’ll find it best to clear the short line by reeling it in and storing it away in the rod holder. Sometimes you can manage to keep it out, especially if you have some help with steering the boat. A fighting fish will go all over the place if you can’t reel it in fast enough.
Top 9 Inshore Trolling Lures
Here are my MUST HAVE Lures for inshore trolling. For all of these lures, I’d pair it with spinning tackle and at least 30 lb line. To learn about which reel to use, check out our article on Best Inshore Spinning Reels.
You might as well call this one snook candy. The prism gives this lure great flash to increase its visibility in the deepest waters. It constantly makes it so the fish sees it, and then doesn’t see it, and that drives the fish crazy. This is a Deep Diver version with 2 lengths: a 6 inch one that can dive up to 20 feet deep and a 5 ¼ inch version can go to 13 feet. You can use this one effectively when trolling around an inshore reef or deep drop off. As you’re driving through these areas, look at your fish finder and when you spot the fish, make a few passes to give the fish time to get curious and take a look
The 3D Crystal Minnow can vary from 3 feet to 7 feet. I love that you can buy a variety of sizes and depths of the Yo-Zuri Crystal Minnow and capture so much height of the water column with the same effective lure design. This lure can be paired with the 3D Crystal Minnow Deep Diver for a full on Crystal Minnow spread. I’ve done this several times when I notice the fish are biting it.
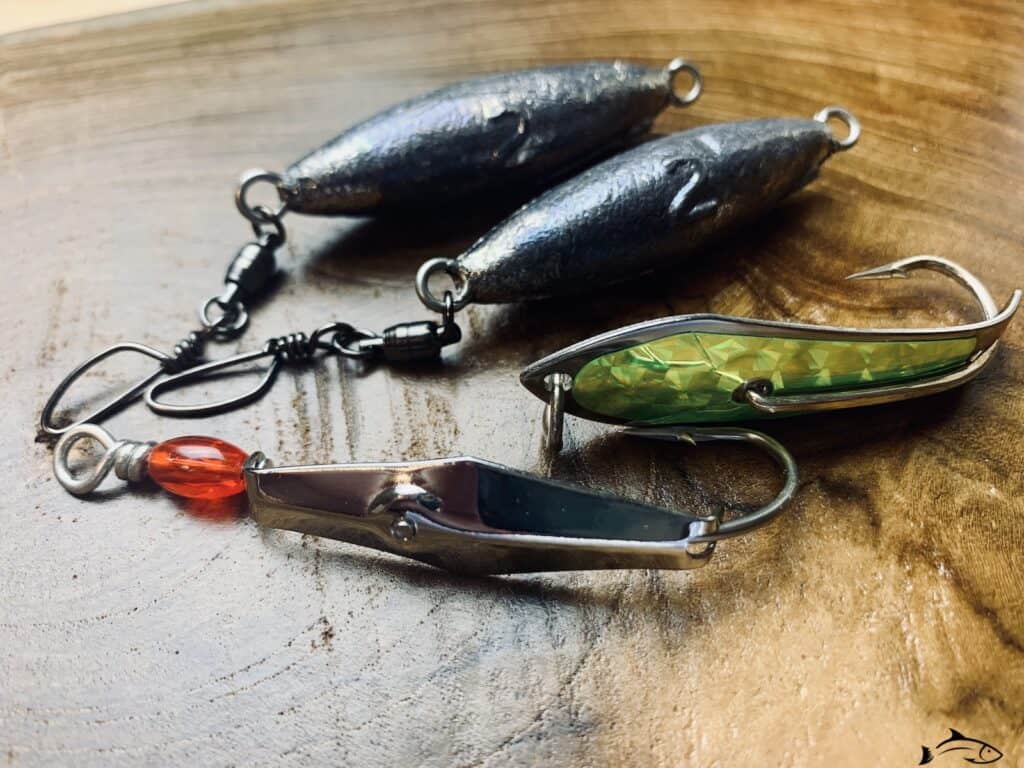
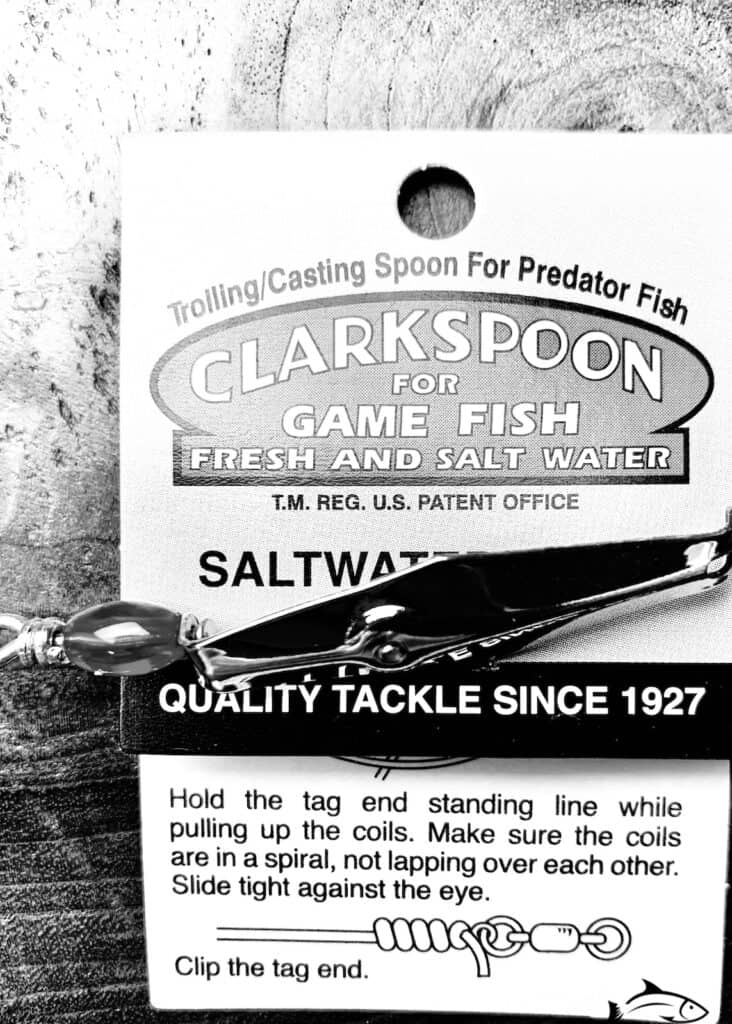
The Clarkspoon Original is an oldie but a goodie. This lure has a built in swivel to avoid line twist and the chrome color provides the flash to catch the attention of fish. Clarkspoons will naturally stay toward the surface, but can be dropped to a depth when paired with a trolling lead. An advantage of the Clarkspoon is that it is built with a strong J hook, instead of a treble hook, so it should be easier to remove from the lip of a fish.
The Clarkspoon Spoon squid has a slightly different action than the Clarkspoon original. The Spoon Squid can be purchased with a shiny sticker for color and flash. The wobble is more erratic on this one so it better mimics an injured baitfish. Similar to the original Clarkspoon, this one will troll on the surface unless you pair it with something like this trolling lead.
The Krocodile is also effective when trolling inshore. This lure can be trolled on the surface when you’re flatlining, or shallow to medium depth with a keel sinker, or deeper depths with a Dipsy Diver. The concave shape results in a nice wobble action and the minnow coloring can help with “matching the hatch”. These lures also have a red flapper tail right near the treble hook which indicates an injury. These are old school, highly trusted lures.
6. L.B. Huntington Drone Spoon
The L.B. Huntington Drone Spoon can be trolled just like the Clarkspoon. On a flatline, it’ll ride the surface, but can reach shallow depths with a keel or trolling sinker. These lures are extremely resistant to the corrosion in saltwater, however you may need to swap the hooks from time to time. The shape of the lure causes a fast wobble and the flash makes it utterly irresistible to fish. I personally like the silver/yellow color when working inshore.
I have countless good things to say about the Acme Kastmaster. This is one of the absolute best lures to have in your tackle box. It is effective trolling spoon and versatile enough to also work great when casting. The Kastmaster is a weighted metal lure with a treble hook and teaser tail on the end. My recommendation with the Kastmaster is to use a tougher leader, like a wire one because the toothier species, such as Spanish macks, love to hit them and I feel like I’m constantly getting this lure bit off.
8. Rapala X-Rap Saltwater (SXR10)
The Rapala X-Rap has a really nice mangrove minnow color. With this lure, I can get between 4 ft and 8 ft deep and redfish seem to love it. This size will need to be trolled somewhat slowly to keep it from popping on the surface. The flash on the X-Rap comes from a line straight down the body of the lure. Rapala did a great job with the artistry on these lures, they’re very lifelike in appearance and action. Make sure you pick up the saltwater version to get the better Perma Steel 3X hooks.
9. Mirrolure Mirrolip L30MR Suspending Crankbait
This lure is loved by many anglers. When traveling at a steady speed with this lure toward the middle of your spread, it will have a tight wobble action continuously. If you use it on outer rods, you will notice it’ll sink on the slack line while it’s the inside of the S curve, and then wobble as the boat turns the other way. This lure works great in depths 2 ft – 10 ft and you can force it deeper by pointing the rod tip down. It has great holographic flash to reflect light in the murkiest of waters and a low frequency rattle to draw fish in from far away. It’s very common for me to succeed with catching redfish and snook with this lure, so I recommend adding it to your arsenal of trolling lures. Lately I’ve been loving the Mardi Gras color.
I hope you enjoyed learning about inshore trolling and I hope the lure selection helps get you started. If you succeed after reading this article, be sure to tag us on Instagram (@tightlinesandhightides) so we can see! And while you’re scoping out our socials, check out our YouTube channel here. Tight lines, y’all!
Recent Posts
Fat Cow Jig Strips: The Ultimate Bucktail Jig Upgrade for Surf Fishing
As discussed in my previous article, "Surf Fishing with Bucktail Jigs: Ultimate Guide for Beach Anglers," bucktail jigs are a staple in any surf angler's tackle box, offering a versatile way to catch...
In my previous article, "Surf Fishing with Bucktail Jigs: Ultimate Guide for Beach Anglers," I introduced you to the bucktail jig and discussed how versatile of a lure it is for catching a wide range...